Furniture Clinic
Rust Remover Liquid
Rust Remover Liquid
Couldn't load pickup availability
Rust Remover Liquid – Professional Soaking & Dipping Solution
This high-efficiency liquid is engineered for deep cleaning and rust removal through soaking. It restores heavily corroded components back to pristine, bare metal without the need for aggressive scrubbing.
✨ Key Product Benefits:
-
🧹 Deep-Acting Power: Effectively strips away rust to reveal the healthy, clean metal beneath.
-
🪣 Optimized for Dipping (DIP): The perfect method for cleaning complex shapes—ideal for bolts, nuts, tools, and automotive parts.
-
⏱️ Rapid Results: Starts dismantling corrosion in as little as 30 minutes.
-
✅ Ready-to-Use: No dilution or mixing required. Just pour and go.
-
♻️ 100% Reusable: Highly economical—after finishing a project, simply store the liquid and reuse it for your next task.
-
🛡️ Surface Safe: Removes rust chemically without abrasives, ensuring no scratches on the metal surface.
-
🔧 Universal Restoration: Suitable for restoring absolutely any type of metal.
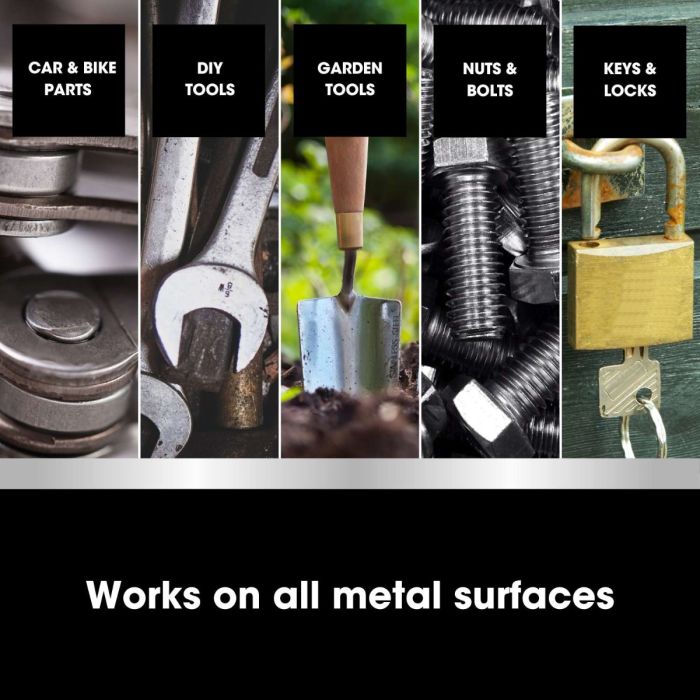
🏠 Where to Use?
The soaking method is perfect for intricate parts where mechanical cleaning is difficult:
-
Automotive & Motorcycles: Engine parts, fasteners, and chrome details.
-
Cycles: Chains, gears, and mechanical components.
-
Tools: Wrenches, gardening gear, and DIY hand tools.
-
Hardware: Nuts, bolts, screws, and washers.
-
Household: Antique keys, padlocks, hinges, and more.
📊 Technical Information & Storage
| Feature | Details |
| Shelf Life | 3 years after opening |
| Reusability | ♻️ Liquid can be reused multiple times during the 3-year period. |
| Storage Temp | Between 10°C and 25°C |
| Conditions | Store in a cool, dry place. Protect from frost and direct sunlight. |
📋 Step-by-Step Instructions (The Soaking Method)
Step 1: Pre-Cleaning
Use a steel wire brush to remove loose, flaky rust from the object.
Step 2: Setup
Shake the bottle well and pour the required amount of liquid into a suitable plastic or metal container.
Step 3: Soaking (Dipping)
Submerge the rusted item completely and let it soak for 30 minutes.
Step 4: Rinse & Brush
Remove the part and rinse with water. Use a brass wire brush to remove any dark grey residue left by the reaction, then dry thoroughly.
Step 5: Repeat (If Necessary)
For heavy, deep-seated rust, leave the item submerged for a longer period or repeat the process.
Step 6: Protect the Metal
To prevent flash-rusting, the clean metal must be painted or protected with an anti-corrosion oil on the same day.
💡 Pro Tips:
-
For Large Items: If an item is too large to submerge or has vertical surfaces, we recommend using our Rust Remover Gel.
-
♻️ Economical Reuse: Don't throw the liquid away! Filter it back into a container to use it again and again (efficiency may slightly decrease over time).
❓ Frequently Asked Questions (FAQ)
Q: When should I choose Liquid over Gel?
A: Use the Liquid when you can fully submerge the item. Choose the Gel for large parts, vertical surfaces, or fixed objects where dipping isn't an option.
Q: Why does the metal turn black after soaking?
A: That black residue is actually carbon. Steel is an alloy of iron and carbon; once the rust is chemically removed, it’s normal for a light carbon film to appear. Simply brush it off with a brass brush to reveal the bright metal underneath.
Share